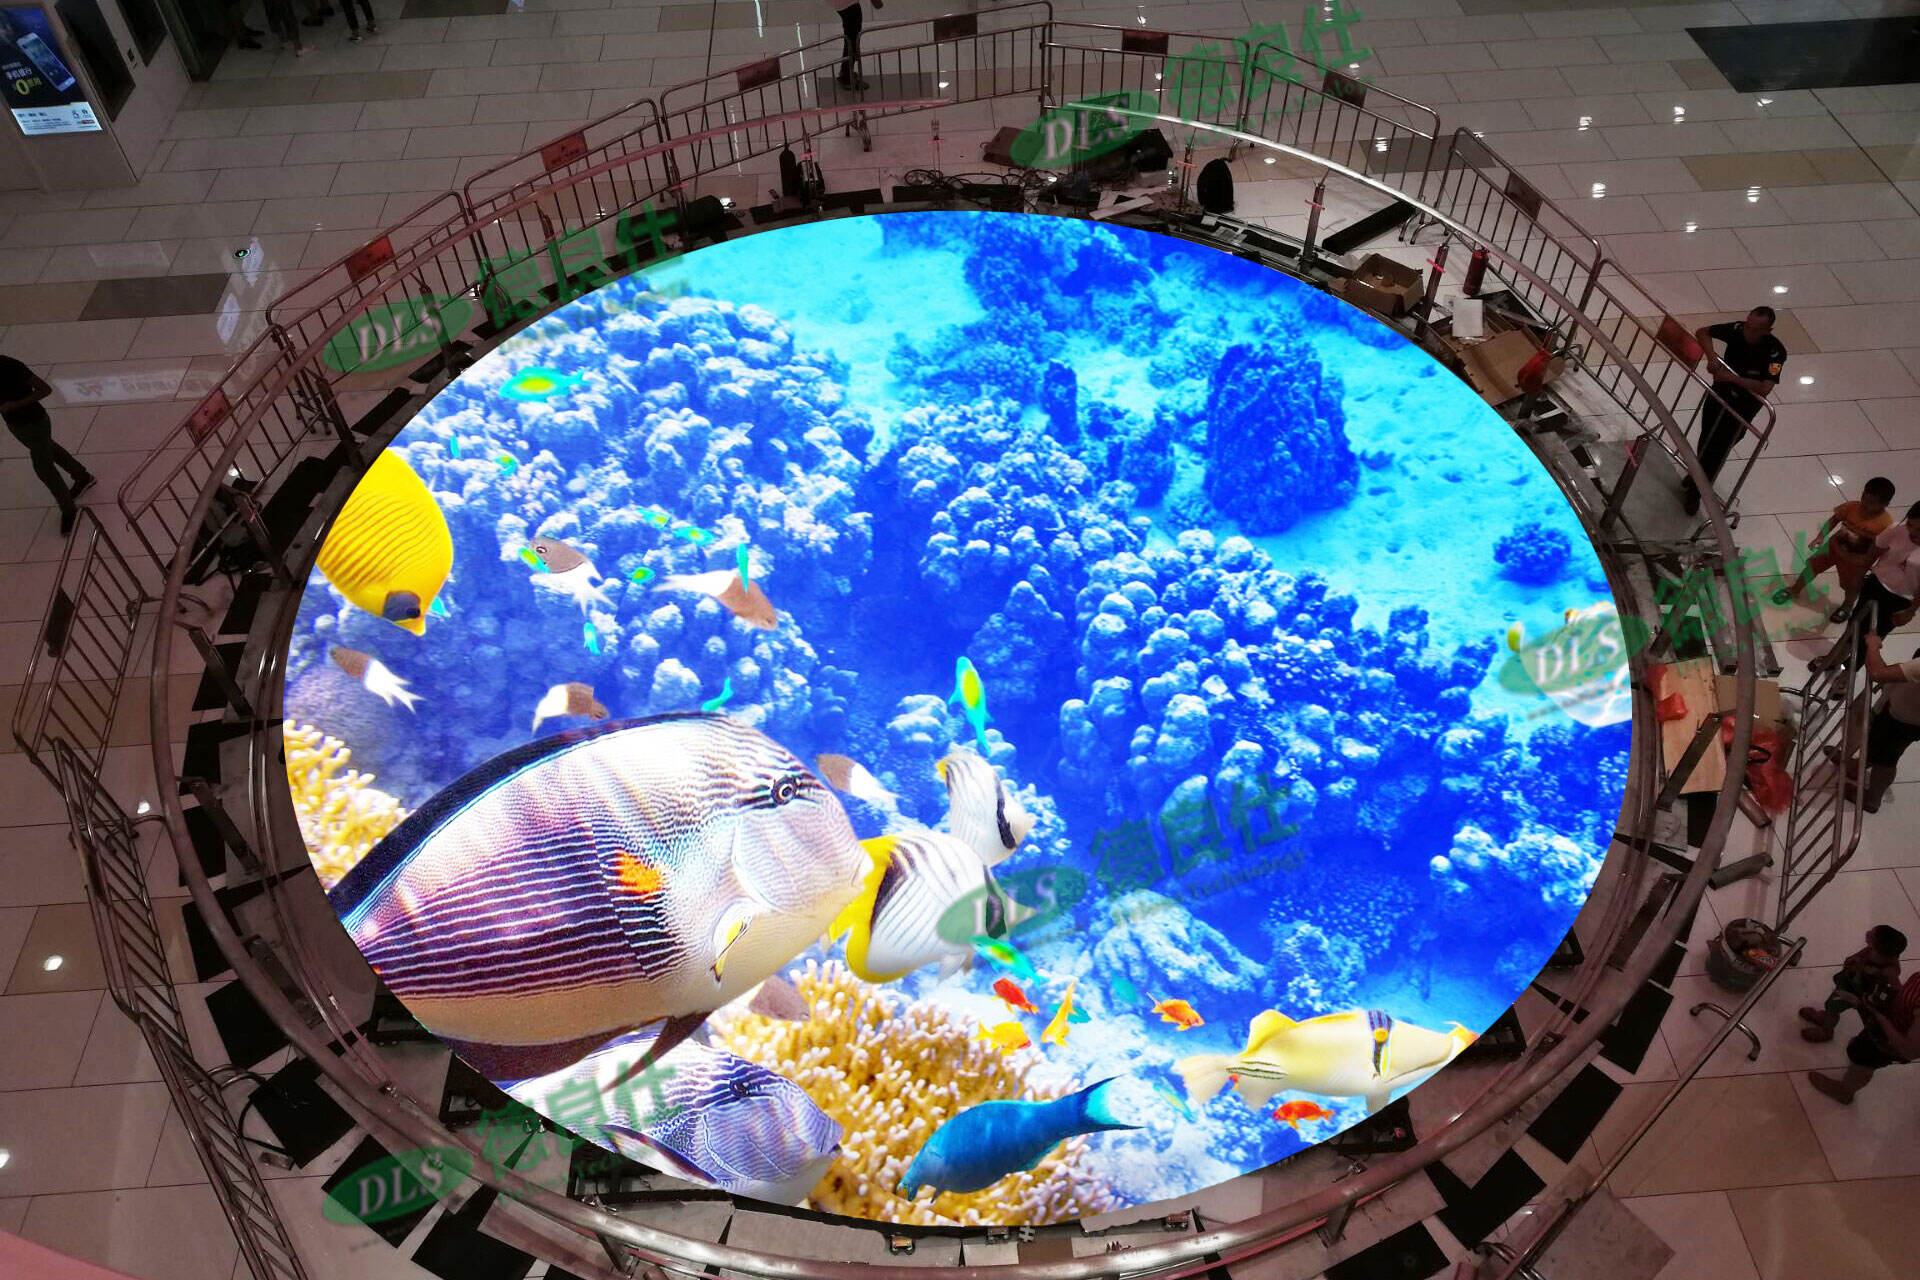
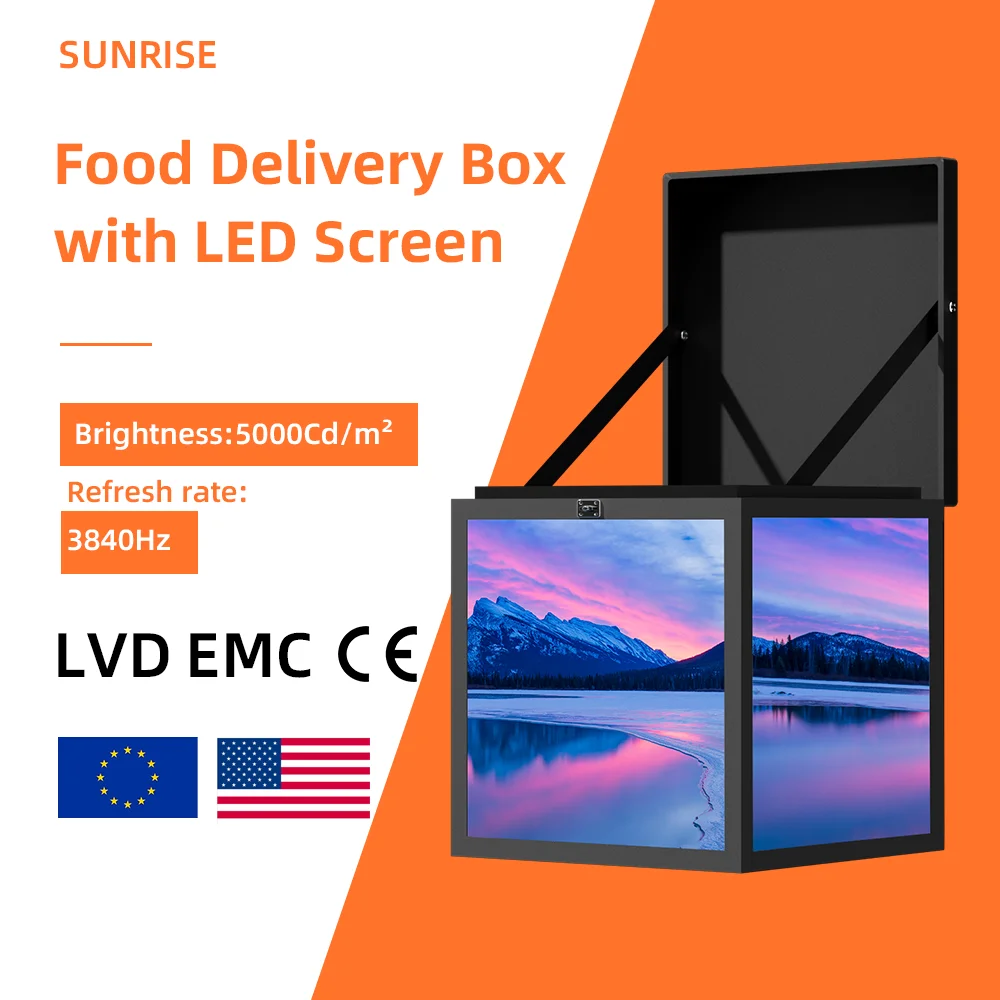

Flexible LED Display: Perfect Solutions for Curved Surfaces
Understanding Flexible LED Display Technology How Flexible LED Screens Work
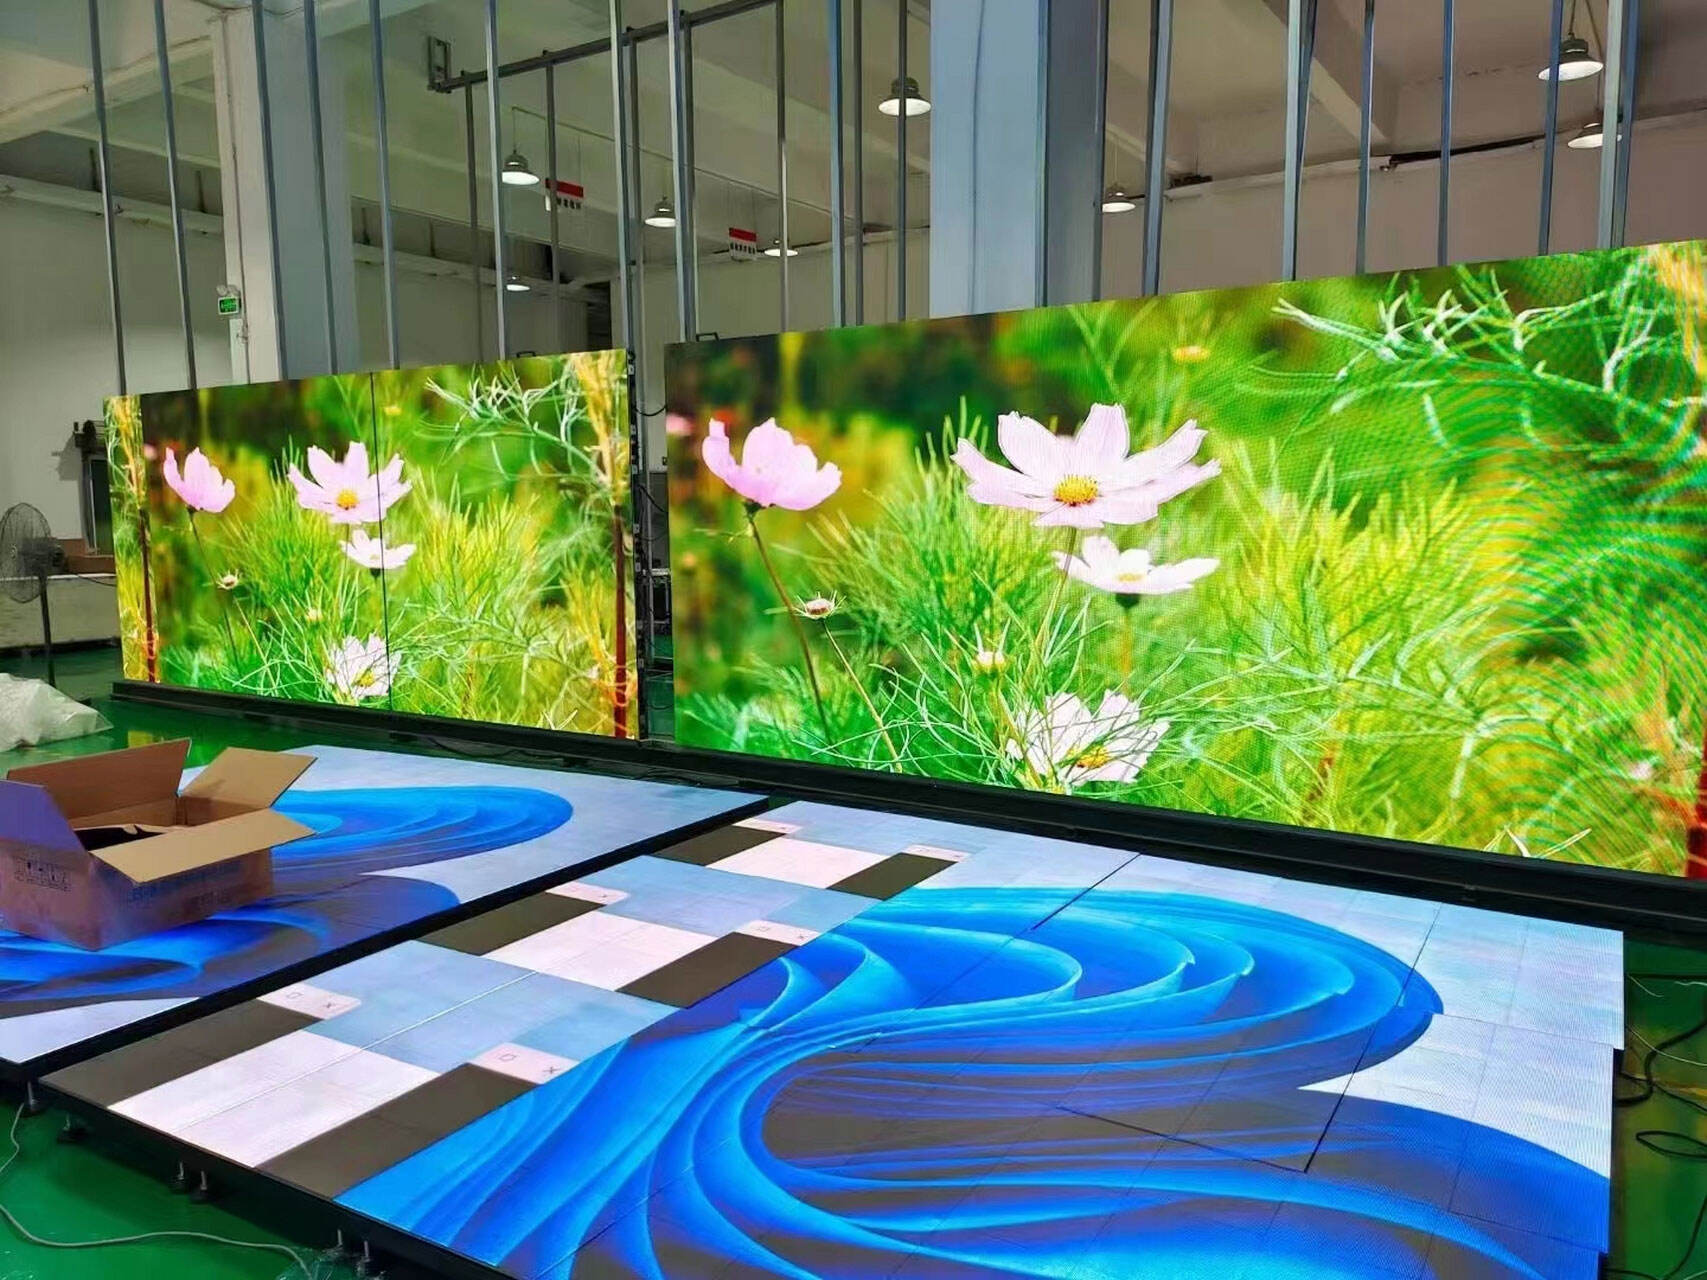
Flexible LED screens work with what's called OLED tech, letting manufacturers make displays that actually bend and curve without breaking. The magic happens at the pixel lev...
View More